
Frequently Asked Questions
- What is subway tile?
- What is a rectified tile?
- What is a large format tile?
- What is polished porcelain?
- What are other porcelain tile finishes?
- What is a porcelain paver?
- What is tile variation?
- What is a handmade tile?
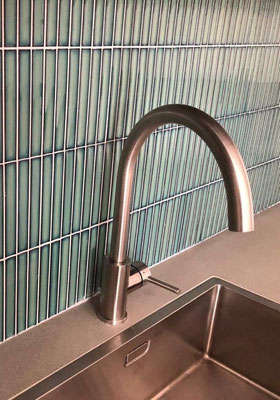
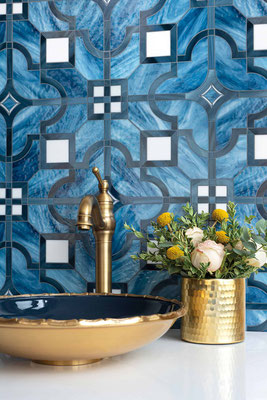
- What are mosaic tiles?
- What is tile edge trim?
- What is electric floor heating?
- What is shower waterproofing?
- What is tile grout?
- Is grout easy to clean?

1. What is a subway tile?
In 1904 New York’s first subway station featured 3” x 6” glazed white ceramic tiles in a brick pattern on the walls which provided a bright background for colourful mosaics, marble, decorative plaques and signs. The sanitary look of the white wall tiles became popular in North American homes and were subsequently nicknamed “subway tiles”. Today, a wall tile (in any colour) reminiscent of that look and format is referred to as a subway tile. It can be 4" x 8", 3” x 12”, 4” x 16”, for instance - not just the old-fashioned 3” x 6” size.
Set in a brick pattern, it's a classic, tailored look that also works well to complement modern design. In a grid pattern, horizontal or vertical stack, the elongated subway tile becomes instantly contemporary - a very versatile finish with many personalities.

Bevelled 4" x 8" (10 cm x 20 cm) subway tile from Mosa (Netherlands) - kitchen backsplash
2. What is a rectified tile?
After the final firing, about 6 mm (1/4”) is cut from the porcelain or ceramic tile all around and the edges are finely machined and finished at the factory with a micro-bevel. The perimeter is then flat and the tiles are perfectly consistent in size which enables a narrow 1.5 mm (1/16") or 2 mm grout joint - and a sleek, modern look.
A natural-edge tile (non-rectified) is not as flat at the ends, has softer, rounded pressed edges… and can sometimes vary in size up to 1 mm - therefore requiring a bigger joint of 3 mm (1/8") or more.
3. What is a large-format tile?
The Tile Council of North America (TCNA) defines a large format tile as any ceramic or natural stone tile with one edge greater than 15". Today, the range of large format tile selections is wider than ever. 24” x 24” (60 cm x 60 cm) is a top choice for floors while thin porcelain panels up to 63” x 126” (160 cm x 320 cm) are growing in popularity for various applications.


40" x 120" 5.6 mm Laminam Italy polished porcelain panels - fireplace renovation
4. What is polished porcelain?
Most floor tiles today are porcelain. Porcelain tile is essentially a type of ceramic tile made with different minerals resulting in enhanced hardness - with a water absorption rate of only 0.5 % or less. Absorption figures higher than 0.5% classify a ceramic tile. Contemporary porcelain tiles are often rectified and polished, especially in the popular and modern 24” x 24” (60 cm x 60 cm) format; some mimicking polished marble tiles.
Unlike glossy ceramic tiles, the shine on polished porcelain tiles is not just from a glaze applied onto the pressed clay body which is then fired in a kiln. Instead, the tile is meticulously machined after firing, and then polished using rotary tools, abrasives, water, and compounds to achieve a dense, glossy, glass-like surface.
5. What are some other porcelain tile finishes?
Besides the typical shiny or matte glaze found on some ceramic and porcelain tiles, which is generally not mechanically altered after firing (more prevalent in non-rectified tiles), there are additional finishes such as honed and lappato.
A honed finish is similar to a matte glaze but is achieved by machining and abrading the surface to be smooth and flat, but not shiny. Sometimes, the honed matte finish is labeled as a natural finish in catalogues, even though it has been somewhat smoothed by machine.
Lappato (Italian for lapped... a machining process) or semi-polished tiles possess a slight texture, where the high spots have a sheen while the remaining surface retains a matte appearance. The complexity increases with the introduction of glazes, engobes, and slips to create textures and colouration on top of the pressed clay composition, which may then be semi-polished... or left as is.
Some finishes described as natural feature a slight texture, without further tooling, after the application of engobe.
Similar to tile formats, the variety of finishes available today is more extensive than ever.
In summary, finishes for porcelain tiles include:
- Glossy glaze
- Matte glaze
- Honed
- Polished
- Lappato or semi-polished
- Natural (matte and/or textured)
6. What is a porcelain paver?
A porcelain paver, also known as 2 cm tile, is specifically designed for tiling outdoor applications such as pool decks, roof decks, wooden decks, patios, terraces, balconies, steps and landings. It is a large format porcelain tile with a thickness of 3/4” (2 cm). Common sizes include 24” x 24” (60 cm x 60 cm) and 24” x 48” (60 cm x 120 cm) - there are plank formats and other sizes available.
Key features of porcelain pavers include:
- Anti-Slip: The surface of porcelain pavers is designed to be anti-slip, with a rating of R11 or higher, providing safety in outdoor environments.
- Versatile Installation: Porcelain pavers can be set in mortar on a concrete slab and grouted. They are robust enough to be laid in sand and gravel on compacted soil.
- Compatibility with Pedestal Systems: These thick tiles are designed to work with pedestal systems, which are short adjustable columns supporting the tile at the edges, with built-in spacers to secure the installation. This system enables drainage through open joints. The substantial weight of the tile (9 lb per sq ft) secures it to the plastic composite pedestal without the need for glue or fasteners.
- Strength and Durability: Porcelain pavers are extremely strong and durable. They are created to compete with large natural stone and concrete paver tiles.
- Variety: Available in stone-, concrete-, and wood-look variations, porcelain pavers offer aesthetic versatility. They maintain their appearance over time - they will not fade, discolour, spall, nor absorb water.
In summary, porcelain pavers are a modern solution for outdoor spaces, combining strength, safety, versatility and aesthetic appeal.


2 cm porcelain pavers in 24" x 48" (60 cm x 120 cm) format: "Brazilian Slate 2Thick" series from Unicom Starker Italy - patio renovation
7. What is tile variation?
Tile variation is the difference in tone or shade from tile to tile. The tone, shade, texture and colour variation is an intentional characteristic designed by the manufacturer for a tile series. Often it is labeled in catalogues and on boxes with a V rating from 1 to 4.
A white subway tile, for instance, is usually V1 with no variation - while a porcelain floor tile that emulates a grey Brazilian Slate may be classified as V3.
- V1 Uniform - very minimal or no discernable difference between tiles
- V2 Slight - subtle yet noticeable difference of tones of similar colour
- V3 Moderate - strong light and dark tone variations of similar colour
- V4 Substantial - very wide and random variation, sometimes even in colours from tile to tile

8. What is a handmade tile?
Traditional handmade tiles are created by combining various raw ingredients such as clay, sand and water into a mold by hand. The only machinery that might be involved is a simple press and a small kiln. Additionally, certain handmade tiles are skilfully glazed and painted by artisans using centuries-old methods. Today there is a renewed interest in artisanal tiles, including terra cotta, Moroccan Zellige, authentic encaustic cement, concrete, Victorian, traditional glazed American and Mexican tiles, and more. Interior designers use handmade tiles to add a warm, earthy and organic touch to modern spaces. Each individual tile is unique, with imperfections, shade variations and irregular edges. In Canada, USA and Mexico there are over 100 active specialty tile makers producing handcrafted tiles... each studio with its own distinct designs.
In response to increasing demand, major tile factories now offer tiles that simulate the handmade aesthetic. These factory-produced tiles feature undulating edges, glaze and tone variations, and patterned prints reminiscent of hand-painted designs - but they don't quite capture the genuine essence and charm of the real thing.
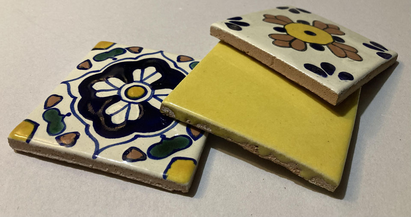
4" x 4" (10 cm x 10 cm) Talavera tiles from Pisos Coloniales de México
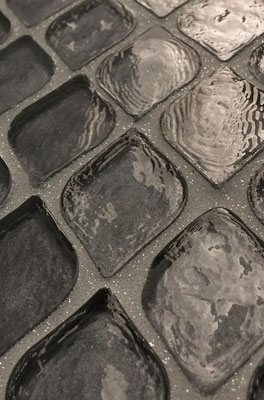
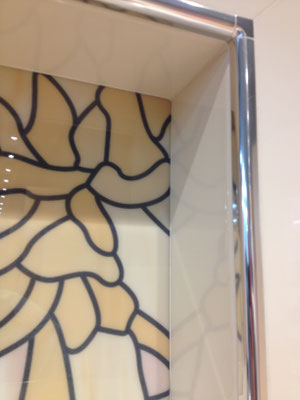
9. What are mosaic tiles?
Mosaics have a rich history, over 4000 years old, as a form of artistic expression, often used to adorn significant structures with intricate designs crafted from carefully arranged tiles. Patterned designs and pictures were created by assembling small hand-cut pieces of stone, glass or ceramic tiles and setting them in mortar.
Today, mosaic tiles are defined as a number of small tiles, typically 3” or smaller, that are mounted on mesh backing or paper-faced sheets and made from natural stone, glass, ceramic, metal, and more.
Mosaic tiles are often used on shower floors because their small size allows them to be set flat and adapt to the slope towards the drain - but they are so much more than that. The vast array of shapes, textures, materials, and colour options is endless, making mosaics versatile for various interior and exterior applications. Whether as a covering for kitchen backsplashes, bathroom walls and floors, fountains, or fully tiled swimming pools, mosaics can infuse any space with captivating interest and texture.
To add even more variety, tile designers introduced waterjet mosaic tiles around 2010. A CNC waterjet cutting machine utilizes a high-pressure water stream with abrasives that produces precision cuts in tile with smooth edges and no breakage. Waterjet mosaics usually consist of intricate designs in natural stone or materials such as metal, glass, mirror, seashells, and more - or a combination of these hard materials.
Mosaics as an art form is still alive and well. From adorning decor pieces such as benches, vases, and mirror frames with little hand-cut tiles to spectacular, large-scale mural installations in public buildings, modern mosaicists continue to produce unique creations, enriching the world with artistry in tile.


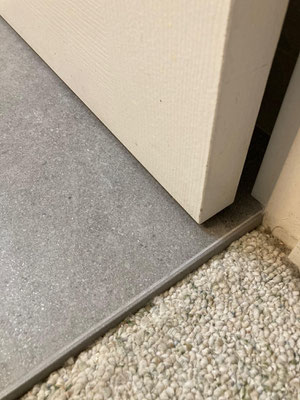
10. What is tile edge trim?
Tile edge trim is a metal moulding that is used to finish a tile edge, where the tile finish terminates or at outside corners of a tile installation. Typically made of aluminum, and available in various finishes, colours and profile designs, they are anchored into the mortar by a thin flange that is positioned under the tile. A slight gap is left between the trim and the tile that is filled during the grouting process. It becomes an integral part of the design - in both looks and function - it protects the edge and can either blend in with the tile finish or accentuate the transition... in a chrome finish, for instance.
Schluter Systems is foremost around the world in the design and production of these metal profiles; so much so that a piece of trim is often colloquially referred to as "the Schluter" in the construction industry. With an extensive catalogue of aluminum and stainless steel profiles for any tile thickness, Schluter provides edge trim for flooring transitions, wall tile edges, outside corners (e.g., around a shampoo niche), stair tread edges, movement joints, and more.


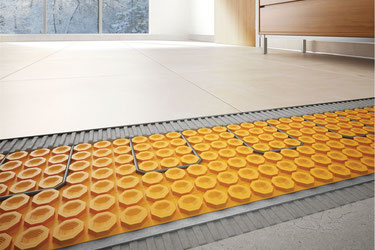
11. What is electric floor heating?
Popular for tiled bathroom floors, an electric floor heat system is an effective and energy-efficient way to create warm tiles. The system is comprised of a thin radiant heat cable that is sized for the space, a thermostat and an underlayment, and is a safe and affordable way to add luxurious comfort to tiled rooms. The cable is encapsulated in mortar directly under the tiles and spaced evenly in runs across the floor. The uniform heat generated from the cables remains in the tile and mortar for an extended period, radiating up to other objects in the room. The sensor probe under the tile signals the thermostat to maintain a set or programmed temperature. It never requires maintenance and cost pennies a day to run.
Running the electric floor heat cable into the tiled shower offers an additional benefit - quickly drying out the shower floor after use. This not only enhances comfort but also helps maintain a cleaner and more hygienic environment.
Schluter Ditra Heat membrane and cable. (Stock photo courtesy of Schluter Systems)
12. What is shower waterproofing?
There has always been misinformation in construction about building a waterproof tiled shower which has resulted in a lot of failures. I have removed many improper shower installations that failed miserably. Often they were tiled over cement-board walls and curbs (cement board doesn’t rot from water exposure but it is absorptive and will let water pass through)… and the shower floor tile was set on a mortar bed over a vinyl liner (the mass of mortar is absorbent and often would be saturated due to improper drain assembly and liner installation). With the mortar bed retaining water, wicking would occur and moisture would find its way to the fasteners and their penetrations, eventually rotting the framing, subfloor, and adjacent drywall panels.
"Isn’t tile waterproof though?"
Well, yes, some dense tiles are actually waterproof in that they do not absorb moisture, but as an assembly, even if it is only two large tile panels, it is possible for moisture to get past the tiles. Some builders here in Canada are still preparing showers that rely on tile and caulking to keep moisture out of the substrate - using building materials directly under the tile that can get saturated. When moisture finds its way under the tile and into the substrate, the processes of capillary action and wicking will keep sending more of it into the substrates and start causing problems. Unfortunately we cannot see what is going on under the tiles and once the signs of damage show up, it is usually too late for a repair... and time for demolition. In some regions, incorrect construction techniques are tolerated, establishing an unfortunate standard. It’s all too common, sadly, and has been a reason for some people to choose alternative finishes despite the unparalleled beauty and diverse designs offered by tiles.
The solution is simple:
Construct a totally waterproof shower before setting tiles - with impervious panels, sealants and membranes. This is what proficient builders do today, whether the local building codes require it or not. It’s wise to overbuild… to ensure that all the surfaces and junctions in a wet area are sealed and watertight - and it is fairly easy to do.
In Australia, the national building code enforces that the entire shower floor area is sealed with a membrane, on top of the tile's substrate - not under, and that waterproofing continues up the wall for a minimum of 180 cm (6’). That makes perfect sense. Why is that not the code here? Even if some moisture gets past the tiles, which we should assume might occur, the amount that gets into the thin layer of material (grout and setting mortar) can dissipate and dry out easily - it is not a large absorptive mass - and the substrates directly under the tiles are protected by continuous waterproofing.
Modern waterproofing products include:
- Polystyrene backer-board - lightweight and waterproof board made for tile and mortar
- Silane-modified polymer sealant - used on seams and fasteners with a polystyrene backer-board system
- Sheet membrane - a polyethylene membrane with fleece on both sides to enable mortar adhesion
- Liquid membrane - a paint-on membrane that is applied by brush, roller, or trowel; designed for tile mortar adhesion
According to the Ceramic Tile Education Foundation a typical shower sees more annual moisture and humidity than a tropical rainforest; over ten times as much!
Therefore… even if we think that moisture might not ever get behind the tiles and grout, let’s make every shower totally waterproof anyway, with correct slopes and careful attention to installation details.
Tile, as a shower finish, should last a lifetime.

A shower prepared for tile using a combination of modern waterproofing products
13. What is tile grout?
Grout is the filler used between tiles. Most commonly it is a composition of cementitious powder and fine aggregates to which water is added. Grout is an important component that consolidates and completes the tile finish. The grout and its colour make a big impact in the overall aesthetic of a tile installation.
For instance, a marble-look 24” x 24” porcelain tile is best finished with a grout colour that is similar to the field colour tint in the tile, so that it blends harmoniously and virtually disappears. The focus is then on the tile design, not the joints.
Conversely, a contrasting grout colour can enhance installations such as a white subway tile wall by showcasing the pattern. It can look very soft with a light grey grout or more dramatic using a darker grey. Also, with small colourful tiles it often looks best to emphasize the size and shape of the tiles by using a contrasting grout colour. When it becomes difficult to decide which colour to choose from a little sample stick, it is a good idea to make small mock-up boards of tile with grout installed.
New-Generation Cementitious Grout:
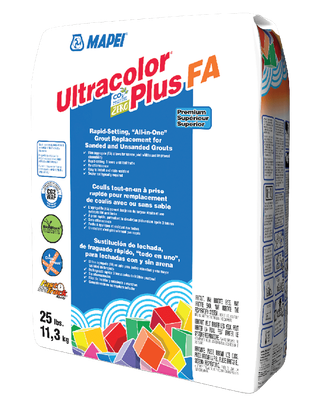
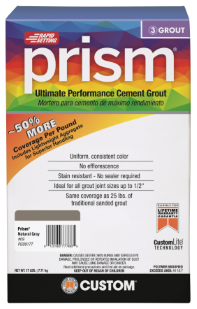
Today’s new-generation calcium-aluminate cement grouts such as Mapei “Ultracolor Plus FA” and Custom Building Products “Prism” use more polymers for increased stain resistance; no sealer required. This is my favourite type of grout to use for most applications. It has made traditional polymer-modified sanded and non-sanded grouts practically obsolete.
- Readily available in many colours
- Colour-matched silicone sealant available
- Fast drying
- Smooth texture
- Stain resistant
- Easy to achieve flush joints and consistent colour
Epoxy Grout:
Comprised of epoxy resin, catalyst/hardener and sand, this chemical grout does not utilize cement or water. It is virtually stainproof and indestructible. The cons are that it is slow drying, not readily available in all colours at the local supply shop, and installation is difficult. Achieving a very full joint on rectified tiles is a challenge. Removal of sticky residue is also somewhat time-consuming.
In certain tile applications epoxy grout should be considered mandatory - restaurant kitchen floors, medical building floors, swimming pools and steam rooms.
Single Component Grout:
A premixed, ready-to-use resinous chemical grout that is virtually stainproof, single component grouts are fairly new but very popular today. No mixing of components required. Slow-curing. Difficult to use and hard to achieve consistently full joints on some tiles though. The sticky residue that is left behind is also a challenge to remove.
Both epoxy and single component grouts are excellent products that offer optimal stain resistance and colour consistency but most tile setters prefer new-generation aluminate-cement grout such as Mapei Ultracolor Plus FA for its versatility and performance.
14. Is grout easy to clean?
People sometimes complain about dirty grout and how difficult it is to clean. Often the case is that it is not installed correctly. Grout applied properly is easy to maintain, preserving a like-new appearance for decades.
For regular maintenance on floors, first sweep then mop with a rinse-free pH-neutral detergent (most liquid dish soaps are pH-neutral but you can also find specialty tile cleaners that are made just for this purpose). Add only a small amount to the water bucket, as directed, to avoid leaving a film. If soap residue is left from using a stronger solution or spot cleaning, rinsing with just water is recommended. For routine cleaning of shower walls and floors, a quick wash with a sponge or soft brush and a pH-neutral cleaner solution is ideal.
Once in a while (annually perhaps), it is good to restore your tiled surfaces with a deep clean. Using a simple method and a household product that is safe for most ceramic and stone tiles, and grout, you can make tiled surfaces and grout look new again.
OxiClean Stain Remover (and good, honest manual labour) is the solution. The main ingredients in this versatile and effective cleaner are basically dry hydrogen peroxide and a washing soda.
Make a wet slurry of OxiClean powder and water. Apply generously with a white Scotchbrite pad and/or soft deck brush. Scrub harder where it is dirtier. Use a small, stiffer brush where necessary. Get busy in all the corners and junctions and hard-to-reach areas too. Let dwell for 10 minutes. Scrub again; add more solution if necessary. Let dwell again for 5 to 10 minutes. Rinse thoroughly with clean water. Dry with towel.
OxiClean is really a remarkable cleaning product for tile and grout.
When a high-performance grout is installed correctly in a proper tile installation, the maintenance is simple.

